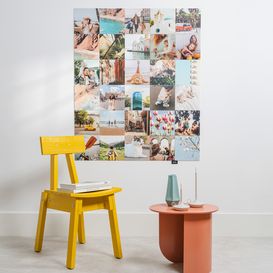
How to: Hang IXXI in a cascade

Create a photo gallery of your stairwell and hang your IXXI in a cascade. In 4 simple steps you achieve a great effect. Quickly view the step-by-step plan!

Step 1: design & prepare

Step 1: design & prepare

Draw your design on an A4 sheet. This is useful to keep to hand when hanging your IXXI and to calculate how many tripods you need. You use these at the corners where your IXXI goes down one step.

Tip: How do you make a tripod? That's very easy! Take an X-connector and cut off 1 leg with cutting pliers or scissors.

Tip: Have the cards of the different 'steps' ready and click them together if necessary.

Tip: At what height should the top of the first step hang? Measure this in advance.

Step 2: Hang it up!

Step 2: Hang it up!

You are going to hang your IXXI, yay! Start at the top and work your way down.

Use the hanging tool and manual to fix the correct number of wall clips on the wall. Then click the first part on the wall.

Tip: click the round part of the wall clip in the corner where you do not attach a card.

Tip: in the other corners click an X-connector or tripod as shown in the illustration. You can attach the next part to this in a moment.

Step 3: Expand

Step 3: Expand

This is already going well! You can add the second step to your IXXI. You do this by simply clicking the cards of the second part to the X-connectors or tripods.

Tip: does the ladder stick out 1 card? Then attach a wall clip with tesa Powerstrip in the corner and hang the card level. Press the wall clip firmly for 5 seconds, and you're done.

Tip: is the second stage wider than 1 card? Then we recommend using the hanging tool. Then you can be sure that the top will hang level.

Step 4: finishing touch

Step 4: finishing touch

Does your design consist of several parts? Then repeat step 3 as often, until you reach the last stage of your IXXI creation. After that, all that remains is to apply the finishing touch, and you can start enjoying homemade IXXI!

Once all the cards are attached, you can fill the bottom corners with the round part of the wall clips. All holes contain a nice tip and your IXXI is complete!

Tip: do not use the circles, but a wall clip in the lower corners and fix it to the wall with a tesa Powerstrip. In this way, your IXXI is attached extra firmly.

Also interesting to know:

Which surface is suitable for hanging an IXXI?

Discover more

The best tips for a perfect photo collage

Discover more

Demo: replace or expand cards

Discover more
Stay up to date and get €5 discount!
Subscribe and receive our digital catalog full of inspiration, updates on special offers, and of course, €5 discount on your first order.
Share